Tesla Charger at Home: Install it and never visit a gas station again!
Save time and money by not having to stop for gas – we’ll professionally install your Tesla charger at home! If you have an existing 220V outlet, we’ll also install it for you.

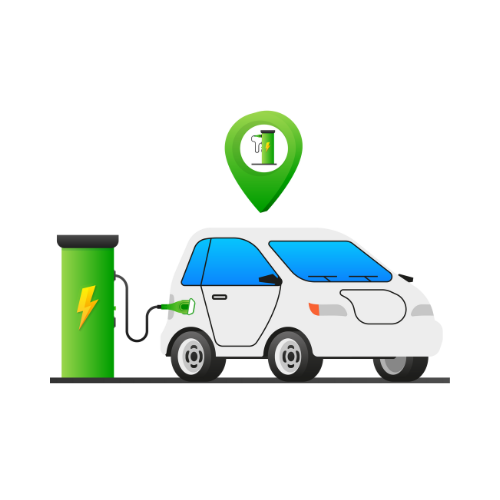
⚡Tesla Charging Station At Home!
Tesla has created a new way to charge your electric vehicle. The company has developed a system that allows you to plug in your car anywhere, even at home. This means that you no longer need to worry about going to a gas station ever again!
How does it work?
Tesla owners can charge their Model S, 3, X, or Y at home using a special connector. The company has already developed an adapter that allows you to plug in your car and eliminate the need for gas stations. You simply plug in your car charger into a wall outlet and connect it to your Tesla and let the battery charge.
How long does it take to charge a Tesla at home?
It depends on the charge level and the state of the battery when you start the charging process. It also depends on whether you use the Mobile Connector (max amperage of 32) or the Wall Connector (max amperage of 48).
Note: Tesla Chargers are waterproof, so you can install them outdoors for more convenience.
You’ll Save Money And Time By Not Having To Stop For Gas.
This is a huge benefit because you won’t have to stop at a gas station every time you fill up. Instead, you can just plug your car into a wall socket and let it do its thing. It will take longer than filling up at a gas station, but it’s still a lot faster than having to go somewhere else to refuel.
The Tesla Mobile Connector (usually comes with the car)
When you have a Tesla charger at home, specifically the Tesla Mobile Connector, you will charge at a max rate of 32 amps, which means from an empty battery you will reach 100% in about 8 hours (perfect for overnight charges when electricity is cheaper than peak times). Please note that this times will only be possible if you use a NEMA 14-50, 240V outlet to connect your mobile connector.
The Tesla Wall Connector (additional purchase from the Tesla Store)
If you buy or get a Tesla Wall Connector from the Tesla store, you will get a maximum amperage of 48 if you use a 60 amp breaker in your circuit panel. This means that you will get even faster charges than your regular Tesla mobile connector (usually comes with the car). One of the main benefits of this additional accessory from the Tesla store is that it is GFCI-equipped, which means the circuit will be interrupted in case of failure.
Looking to install a Tesla charger in your home or office in Woodbridge, VA?
Look no further! Our team of experts specializes in providing seamless and hassle-free installations of Tesla chargers, bringing the convenience of charging right to your doorstep. Whether you prefer to charge overnight at home or need a reliable charging solution at your workplace, we’ve got you covered. Our skilled technicians will work with you to assess your specific needs and ensure a smooth installation process, tailored to your preferences. Say goodbye to the inconvenience of searching for public charging stations and embrace the luxury of having a Tesla charger right where you need it most. With our expertise and dedication to customer satisfaction, you can trust us to deliver a reliable and efficient charging solution for your home or office in Woodbridge, VA. Take control of your charging experience and enjoy the convenience of having a Tesla charger installed by our team of professionals.
Complete Guide to Installing a Tesla Charger at Home
Introduction: What is a Tesla Charger and Why Install One at Home?
Tesla Chargers are an essential part of owning a Tesla electric vehicle. They provide a convenient and safe way to charge your vehicle at home or on the go. By installing a Tesla Charger at home, you can save time, money and energy while ensuring that your car is always ready to go when you need it. In this article, we will look at what a Tesla Charger is, why you should install one at home and how to get it installed.


Step-by-Step Guide to Installing a Tesla Charger at Home
Installing a Tesla charger at home is a great way to keep your electric vehicle powered up and ready for the road. With this step-by-step guide, you’ll be able to get everything you need and complete the installation process in no time. From understanding what you need for the installation to ensuring that all safety measures are taken, this guide will provide you with all the information required to make sure your Tesla charger is installed correctly. So let’s get started!
- Determine the type of Tesla charger you need: There are two types of Tesla chargers available – the Tesla Wall Connector and the Tesla Mobile Connector. The Wall Connector is a fixed charging station that requires a professional installation, while the Mobile Connector is a portable charger that can be used with a standard outlet.
- Choose a location for the charger: The location you choose for the charger should be close to your electrical panel and your parking spot. The Wall Connector should be mounted on a sturdy, flat surface, while the Mobile Connector can be plugged into any outlet within range of your car.
- Check your electrical panel: Before installing the charger, you need to make sure your electrical panel can support the added load. Your electrical panel should have a 60-amp circuit breaker for the Wall Connector and a 40-amp circuit breaker for the Mobile Connector.
- Hire a licensed electrician: Installing a Tesla charger requires working with electricity, so it’s important to hire a licensed electrician to do the job. They will ensure the charger is installed safely and up to code.
- Install the charger: If you’re installing the Wall Connector, the electrician will need to run a conduit from your electrical panel to the location of the charger, mount the charger, and connect the wiring. If you’re installing the Mobile Connector, simply plug it into the outlet.
- Test the charger: Once the charger is installed, test it out to make sure it’s working properly. Plug in your Tesla and monitor the charging process to ensure everything is functioning as it should.
- Enjoy your new charger: With your new Tesla charger installed, you can enjoy the convenience of charging your car at home. You’ll no longer have to worry about finding a charging station or waiting in line to charge your vehicle.
Remember, the installation process may vary depending on the specifics of your home and the type of charger you choose. Be sure to follow all instructions carefully and consult with a licensed electrician if you have any questions or concerns.
Tesla Chargers – Types & Benefits
Tesla Chargers are a great way to keep your electric vehicle charged and ready for use. With the right charger, you can ensure that your EV is always charged and ready to go when you need it. There are several types of Tesla Chargers available, each offering different benefits depending on your needs. In this article, we will explore the different types of Tesla Chargers and the benefits they offer. We will also compare the Tesla Supercharger vs Wall Connector and the Tesla Mobile Connector vs UMC so that you can make an informed decision when choosing the right charger for your EV.


Costs and Savings associated with Installing a Home Tesla Charger
Installing a home Tesla charger can be a great way to save money in the long run. Not only does it provide convenience for charging your vehicle, but it also helps you save on fuel costs and reduce your carbon footprint.
The cost of installing an EV charger at home depends on several factors such as the type of charger, installation location, and the complexity of the wiring. However, with careful planning and research, homeowners can find ways to reduce the cost associated with installing a Tesla charger.
By taking advantage of government incentives and tax credits available for electric vehicle owners, homeowners can drastically reduce their initial investment in an EV charger. Additionally, savings from reduced fuel costs can help offset installation fees over time.
other services

TV Mounting

electrician services

Drywall Repair

Wall Hanging
EV Charger
Unleash the Power of Your Tesla: How to Install a Home Charging Station
Are you the proud owner of a Tesla, but tired of relying on public charging stations? It’s time to take control and unleash the full potential of your electric vehicle by installing a home charging station. With a home charging station, you can conveniently charge your Tesla overnight, ensuring that it’s always ready for your next adventure. But where do you start? In this guide, we will walk you through the process of installing a home charging station, from selecting the right equipment to ensuring a safe and efficient installation. We’ll also provide you with tips and tricks to optimize your charging experience and maximize the benefits of owning an electric vehicle. So, get ready to say goodbye to range anxiety and embrace the freedom of charging your Tesla from the comfort of your own home. Let’s dive in and discover how to unlock the power of your Tesla with a home charging station.
The Importance of a Home Charging Station for Tesla Owners
As a Tesla owner, you already know the convenience and environmental benefits of driving an electric vehicle. However, relying on public charging stations can be a hassle. Long wait times, inconvenient locations, and the uncertainty of availability can quickly become frustrating. That’s where a home charging station comes in. By installing a home charging station, you can eliminate these inconveniences and take control of your charging needs.
A home charging station allows you to charge your Tesla at any time, whether it’s during the day or overnight. This means you no longer have to worry about finding a charging station while you’re out and about or waiting in line for a spot to open up. Instead, you can simply plug your Tesla into your home charging station and let it charge at your convenience. Plus, charging your Tesla at home is often faster than using public charging stations, so you can spend less time waiting and more time enjoying the open road.
But the benefits of a home charging station go beyond convenience. By charging your Tesla from home, you can take advantage of lower electricity rates during off-peak hours, saving you money in the long run. Additionally, home charging stations are more energy-efficient than public charging stations, reducing your carbon footprint even further. With a home charging station, you have the power to not only drive an electric vehicle but also contribute to a more sustainable future.
Installing a home charging station may seem like a daunting task, but with the right information and guidance, it can be a straightforward process. In the following sections, we will explore the different types of home charging stations available for Tesla vehicles and help you choose the right one for your needs.
Types of Home Charging Stations for Tesla Vehicles
When it comes to home charging stations for Tesla vehicles, there are two main options to consider: Level 1 chargers and Level 2 chargers. Let’s take a closer look at each type and their respective benefits.
**1. Level 1 Chargers**: Level 1 chargers are the most basic type of home charging stations. They typically come with your Tesla and can be plugged into a standard household electrical outlet. While Level 1 chargers are the slowest option, they are still a viable choice if you have ample time to charge your Tesla. On average, a Level 1 charger can provide around 3-5 miles of range per hour of charging. This means that if you have a full day or overnight to charge your Tesla, a Level 1 charger can be sufficient.
**2. Level 2 Chargers**: If you’re looking for faster charging speeds, a Level 2 charger is the way to go. Level 2 chargers require a dedicated 240-volt electrical circuit, similar to what is used for large appliances like electric dryers or ovens. These chargers can provide around 25-30 miles of range per hour of charging, significantly faster than Level 1 chargers. With a Level 2 charger, you can fully charge your Tesla overnight, ensuring that it’s ready to go in the morning.
The choice between a Level 1 charger and a Level 2 charger ultimately depends on your charging needs and lifestyle. If you have ample time to charge your Tesla and don’t require fast charging speeds, a Level 1 charger can be a cost-effective solution. However, if you’re looking for quicker charging times and the convenience of a full charge overnight, a Level 2 charger is the recommended option. In the next section, we’ll delve into the factors you should consider when choosing a home charging station for your Tesla.
Factors to Consider When Choosing a Home Charging Station
When selecting a home charging station for your Tesla, there are several important factors to take into account. By considering these factors, you can ensure that you choose the right charging station that meets your needs and provides a safe and efficient charging experience. Let’s explore these factors in more detail.
**1. Charging Speed**: As mentioned earlier, the charging speed is an essential consideration when choosing a home charging station. If you have a daily commute that requires a lot of miles or frequently take long road trips, a faster charging speed provided by a Level 2 charger will be beneficial. On the other hand, if you primarily use your Tesla for short commutes or have ample time for charging, a Level 1 charger may suffice.
**2. Electrical Capacity**: Before installing a home charging station, it’s crucial to evaluate your home’s electrical capacity. Level 2 chargers require a 240-volt electrical circuit, which may require an upgrade to your existing electrical infrastructure. It’s recommended to consult with a qualified electrician to assess your home’s electrical capacity and determine if any upgrades or modifications are necessary.
**3. Compatibility**: Ensure that the home charging station you choose is compatible with your Tesla model. Tesla vehicles are equipped with a standard charging port, but it’s always a good idea to double-check compatibility before making a purchase.
**4. Safety Features**: Safety should be a top priority when selecting a home charging station. Look for charging stations that are certified and meet industry safety standards. Features such as ground fault circuit interrupters (GFCIs) and surge protection can provide an extra layer of protection against electrical faults, ensuring a safe charging experience.
**5. Cost**: While cost should not be the sole determining factor, it’s still an important consideration. The cost of home charging stations can vary depending on the brand, features, and charging speed. It’s recommended to compare different options and choose a charging station that offers the best balance between price and performance.
By considering these factors, you can make an informed decision and choose a home charging station that meets your specific needs. In the next section, we’ll guide you through the step-by-step process of installing a home charging station for your Tesla.
Steps to Install a Home Charging Station for Your Tesla
Installing a home charging station for your Tesla may seem like a complex task, but with the right guidance, it can be a straightforward process. Here are the steps to follow to ensure a safe and efficient installation:
**Step 1: Determine the Location**: Start by selecting the location for your home charging station. Ideally, the charging station should be installed in a convenient and easily accessible location, such as your garage or driveway. Consider factors such as the proximity to your Tesla, available space, and electrical accessibility when choosing the location.
**Step 2: Assess Electrical Capacity**: Before proceeding with the installation, it’s crucial to assess your home’s electrical capacity. As mentioned earlier, Level 2 chargers require a dedicated 240-volt electrical circuit. Consult with a qualified electrician to determine if any electrical upgrades or modifications are necessary.
**Step 3: Obtain Permits**: Depending on your local regulations, you may need to obtain permits before installing a home charging station. Check with your local authorities to ensure compliance with any necessary permits or regulations.
**Step 4: Purchase the Charging Station**: Once you’ve determined the location, assessed your electrical capacity, and obtained any necessary permits, it’s time to purchase the home charging station. Select a charging station that meets your needs and is compatible with your Tesla model.
**Step 5: Install the Charging Station**: While installation procedures may vary depending on the charging station and your home’s electrical setup, it’s generally recommended to hire a qualified electrician for the installation. A professional electrician will ensure that the charging station is properly installed, following all safety protocols and electrical codes.
**Step 6: Test and Activate the Charging Station**: After the installation is complete, it’s essential to test the charging station and ensure that it’s functioning correctly. Follow the manufacturer’s instructions for testing and activating the charging station, and consult with your electrician if you encounter any issues.
By following these steps, you can install a home charging station for your Tesla and enjoy the convenience of charging your vehicle from the comfort of your own home. In the next section, we’ll explore the pros and cons of hiring a professional versus a DIY installation.
Hiring a Professional vs. DIY Installation
When it comes to installing a home charging station for your Tesla, you have two options: hiring a professional electrician or opting for a DIY installation. Each option has its own pros and cons, and the choice ultimately depends on your comfort level and expertise. Let’s weigh the benefits and drawbacks of each approach.
**1. Hiring a Professional**: Hiring a professional electrician ensures that the installation is done correctly and safely. Electricians have the knowledge, experience, and tools required to handle electrical installations, minimizing the risk of accidents or electrical faults. Additionally, a professional installation may be required to comply with local regulations and warranty requirements.
However, hiring a professional electrician can be more expensive compared to a DIY installation. The cost of labor and any necessary electrical upgrades or modifications can add up. It’s recommended to obtain multiple quotes from reputable electricians to ensure a competitive price.
**2. DIY Installation**: Opting for a DIY installation can save you money on labor costs, especially if you have the necessary electrical skills and tools. DIY installations can be relatively straightforward, especially if you already have a basic understanding of electrical systems and wiring. There are numerous online resources and step-by-step guides available to assist you throughout the installation process.
However, DIY installations come with their own risks. If not done correctly, an improper installation can lead to electrical faults, damage to your Tesla, or even personal injury. It’s crucial to have a thorough understanding of electrical systems and follow all safety protocols when attempting a DIY installation. If you’re unsure about any aspect of the installation, it’s best to consult with a professional electrician.
Considering the complexity and potential risks involved, it’s generally recommended to hire a professional electrician for the installation of a home charging station. A professional installation ensures that the charging station is correctly installed, compliant with regulations, and safe to use. However, if you have the necessary electrical skills and feel confident in your abilities, a DIY installation can be a cost-effective option.
In the next section, we’ll provide you with some tips to maintain and maximize the performance of your home charging station.
Tips for Maintaining and Maximizing the Performance of Your Home Charging Station
Now that you’ve successfully installed a home charging station for your Tesla, it’s essential to maintain and optimize its performance. By following these tips, you can ensure that your charging station operates efficiently and provides a seamless charging experience.
**1. Regularly Inspect and Clean**: Routinely inspect your charging station for any signs of wear or damage. Clean the charging cable and connector to remove any dirt or debris that may affect the charging process. A clean and well-maintained charging station will ensure a reliable connection and optimal charging performance.
**2. Monitor Charging Speed**: Keep an eye on the charging speed of your home charging station. If you notice a significant decrease in charging speed, it may indicate an issue with the charging station or your Tesla. Consult with a qualified electrician or Tesla service center if you experience any charging speed-related problems.
**3. Optimize Charging Schedule**: Take advantage of off-peak electricity rates by scheduling your charging sessions during low-demand hours. Many home charging stations offer scheduling features that allow you to set specific charging times. By charging your Tesla during off-peak hours, you can save money on electricity costs.
**4. Practice Plug-In Discipline**: When connecting your Tesla to the charging station, ensure that the connection is secure and properly plugged in. Avoid tugging or pulling on the charging cable to minimize wear and tear. By practicing plug-in discipline, you can prolong the lifespan of your charging station and minimize the risk of electrical faults.
**5. Stay Up to Date**: Keep yourself informed about any software updates or firmware releases for your home charging station. Regularly check the manufacturer’s website or subscribe to their newsletter to stay up to date with the latest improvements and enhancements. Updating your charging station’s software can improve performance and resolve any potential issues.
By following these tips, you can maintain your home charging station in optimal condition and maximize its performance. However, even with proper maintenance, you may encounter some common troubleshooting issues. In the next section, we’ll explore these issues and provide solutions.
Common Troubleshooting Issues and How to Fix Them
While home charging stations for Tesla vehicles are generally reliable, you may encounter some common troubleshooting issues. By understanding these issues and their solutions, you can quickly resolve any charging-related problems. Let’s explore some of the most common issues and how to fix them.
**1. Charging Cable Overheating**: If you notice that your charging cable is overheating during charging, it may indicate a problem with the connection or a faulty cable. First, check that the cable is securely plugged into both the charging station and your Tesla. If the cable continues to overheat, it’s recommended to consult with a qualified electrician or Tesla service center to diagnose and resolve the issue.
**2. Slow Charging Speed**: If your home charging station is providing a slower charging speed than expected, there may be several factors at play. Start by checking the electrical capacity of your home and ensuring that it meets the requirements of your charging station. If the electrical capacity is not the issue, it’s recommended to consult with a qualified electrician or Tesla service center to diagnose and troubleshoot the problem.
**3. Charging Interruptions**: If your charging sessions are frequently interrupted, it may indicate a problem with the electrical connection or the charging station itself. Check that the charging cable is securely plugged in and that there are no loose connections. If the interruptions persist, consult with a qualified electrician or Tesla service center to identify and resolve the issue.
**4. Error Messages on the Charging Station**: If you encounter error messages on your home charging station, refer to the manufacturer